From any page on site click the online store button on top of page;
In the product pages click on the Shopping Cart icon when it appears next to a particular product available on store;
Step 1
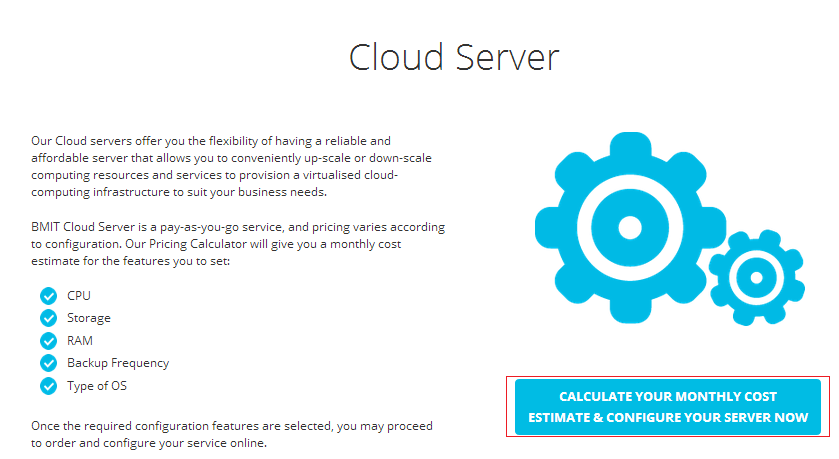
In this example, by clicking the option to view more information about the product, the user is taken to the Cloud Server Product Page and given more information as well as the possibility to calculate the costs involved prior to purchasing:
The online
calculator is useful since the dynamic Cloud Server is the only cloud
service charged post-used. This will allow you to change the server
configuration any time, and get charged only for the resources used.
In contrast to the
monthly or annual charges applicable to virtual server, a Cloud Server
is charged hourly, thereby giving full control to the user on the
charges involved.
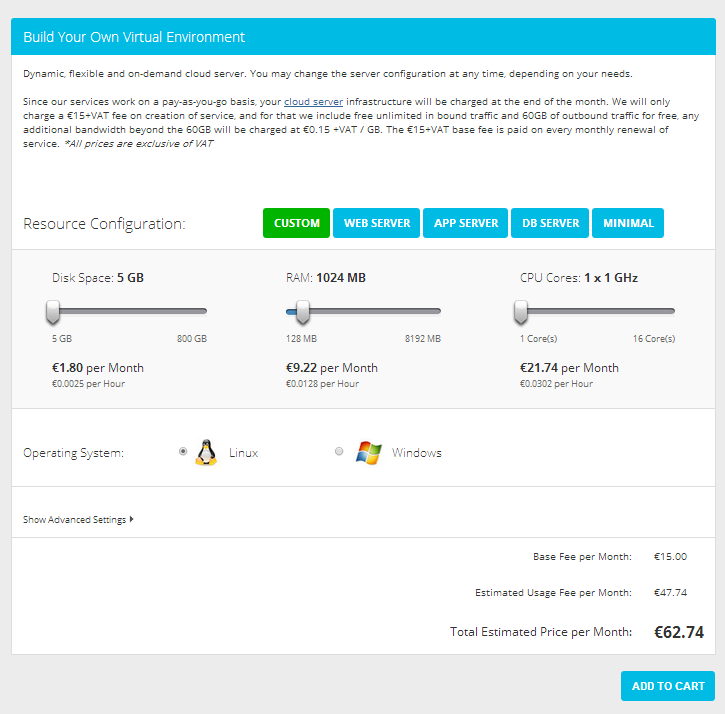
Step 2
On clicking the ‘Calculate’ icon, an easy-to-use screen is presented, allowing you to vary the following resources:
CPU
Storage
RAM
Backup Frequency
Type of OS
Click ‘ADD TO CART’ to proceed
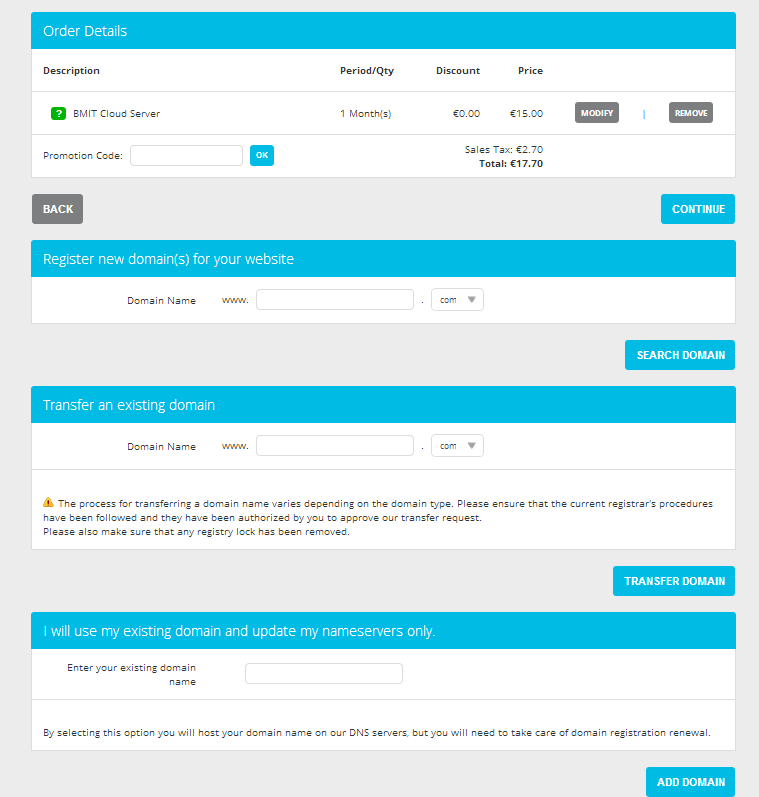
Step 3
On clicking the ‘ADD TO CART’ the Order Screen is presented, giving:
A summary of any
payments due (in this case a monthly fee of €15 (exc VAT) is charged to
cover for server creation and up to a 50GB of bandwidth for the first
month);
Ability to register or transfer a domain to use with the service;
Choice to retain existing domain;
If any domain option is chosen, domain charge is added to the order details upon next page prior to check out.
Select ‘CONTINUE’ to proceed
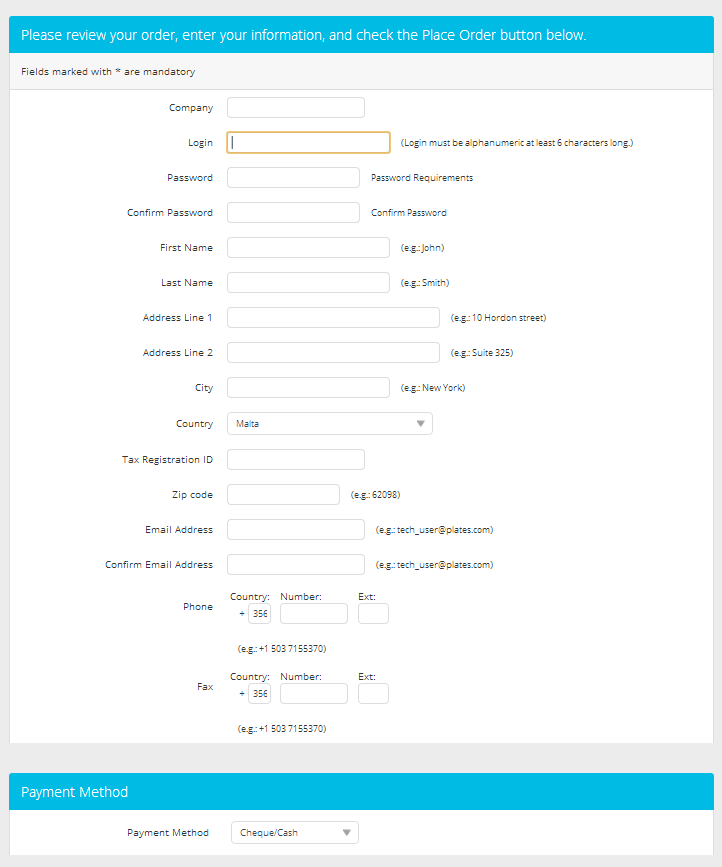
Step 4
You are then prompted to enter:
Personal details;
Login details, to be eventually used to access your control panel;
Other details to ensure correct communications, including despatch of administrative and financial information.
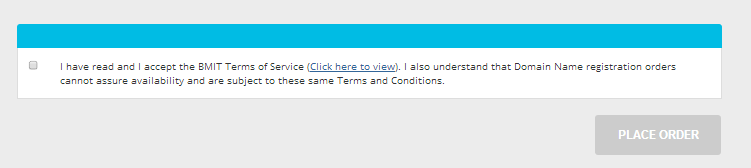
In the payment method options customer is to choose whether to pay via Cheque/cash or Debit/Credit Card. This option should be selected before placing order and confirming terms and conditions.
Upon entering all details and accepting the terms of service, please proceed to PLACE ORDER
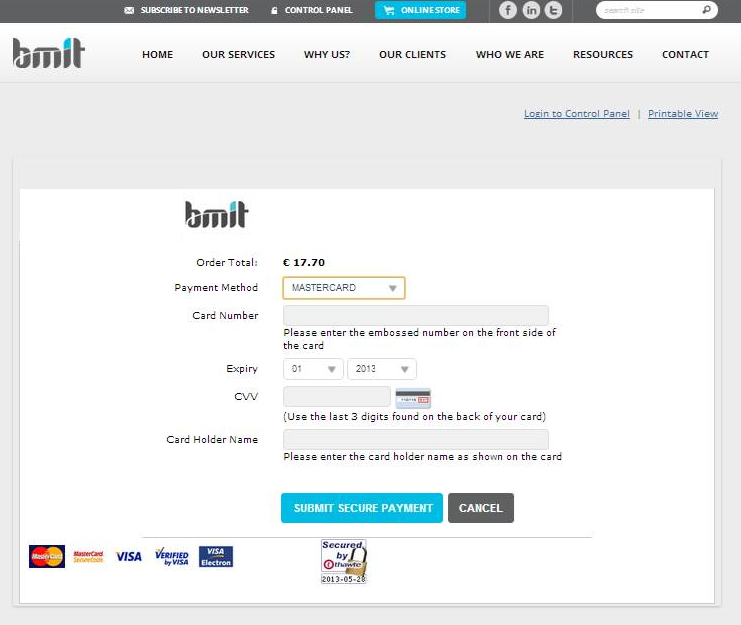
The next screen is determined by whether you have chosen an offline or an online payment method:
Cash/cheque requires manual approval of service by BMIT once funds are received.
Debit/credit cards
will prompt customer to the next screen that requires payment details.
Once transaction is completed and successful, service is activated and
ready to be configured and used.
Once order is complete, you are prompted to login to the control panel using login details entered upon service order.
Notification
emails for successful orders are automatically sent to the email address
provided during registration. Such notifications will include welcome
emails to BMIT’s Cloud server subscription and confirmation of order
placement.
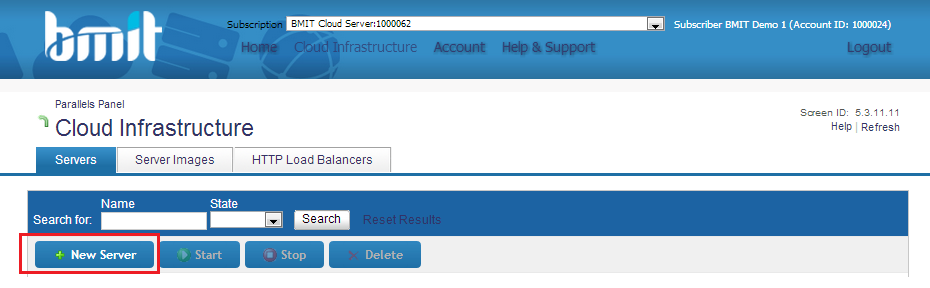
Go to the ‘Cloud Infrastructure’ Tab and click on add new server
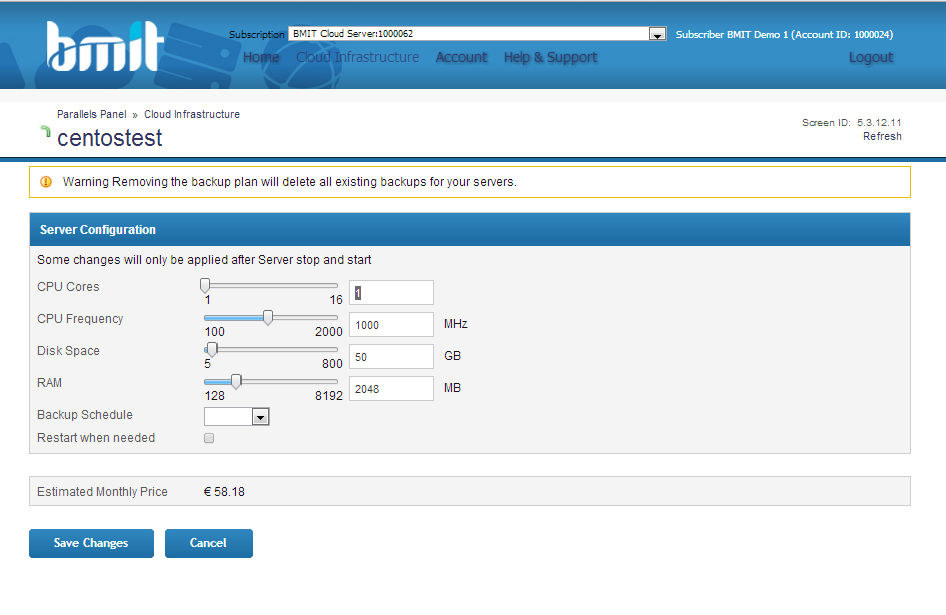
Settings are confirmed or changed as required
Please note that:
In the case of a Microsoft Windows machine you must select the I will manage the OS Kernel. Minimum specifications for Microsoft Windows OS – CPU: 2000Mhz; RAM: 2GB